Galaxy
NOTE: This page continues to evolve. We welcome feedback on our Slack channel
Galaxy is a well known, Web-based platform of tools, aimed primarily at bioinformaticians, but has broadened in scope over the years. With generous help from the Galaxy community, we have ported PhysiCell Studio to run as an Interactive Tool. If you do not yet have an account, register for one - it is free and requires very little information. Once you have an account, login and follow the steps below to run PhysiCell Studio.
Initial comments
currently only 2D models are allowed
when you run PhysiCell Studio, it starts from scratch, i.e., it does not retain the results from a previous session. However, it is possible to load a previous model. To incrementally save your model as you are developing it (highly recommended), use the “File -> Save project” menu item. This will save a .zip onto your Galaxy History (details below)
some functionality found in the desktop version is missing in the Galaxy version
a session remains active for about 24 hours
there is only one /output directory for simulation results
when you “Run” a simulation (in the Run tab), the current .xml model config file will be overwritten with any changes to model parameters, and all existing files in the /output directory will be deleted and new simulation results will be written to /output (but will not persist across multiple Studio sessions)
output results (5 files) will be automatically saved only when you quit (“Studio menu -> Quit”)
Register for a Galaxy account

Registering for a Galaxy account should be straightforward. Try to register at https://usegalaxy.org/ . After you register, check your email for a confirmation message.
After you have registered (one time), you just need to Login to your account.
Login and start PhysiCell Studio
After successfully registering for and getting an account on Galaxy, you are ready to use its tools. The one of interest for this tutorial is PhysiCell Studio.

the Galaxy Tools column lists all available tools. You can search for “PhysiCell Studio”

the tool takes some time (maybe a minute or two) to become active
notice that the tool “produces 5 outputs”. However, as noted in the initial comments above, these files only get generated if/when the user quits the tool. To save a model during a session, use “File -> Save project”.

after the “Open” link appears, click it
Note
If the “Open” link seems to take too long to appear, check to see if you have a previous Studio or another Interactive Tool already running (select the “Interactive Tools” icon in the left column). You are not allowed more than one Interactive Tool to run simultaneously.

click the Run Tool to open PhysiCell Studio in an adjacent tab of your browser
Studio overview

to run the default simulation, click the Run tab and press the “Run simulation” button.
At this point, you should be able to follow instructions elsewhere for basic use of the Studio. https://physicell-studio.readthedocs.io/en/latest/guide.html#config-basics . However, you will want to return to this page for Galaxy-specific instructions, especially regarding saving (or loading) a project, or saving simulation results.
Reconnect the Studio session

if you see “pcstudio - Disconnected”, it should automatically reconnect (in the latest version of Galaxy); however, if not, just refresh this page in your browser to manually reconnect.
Saving your project
It is GOOD PRACTICE TO INCREMENTALLY SAVE the model you are developing. This is especially true for an interactive cloud-hosted application like PhysiCell Studio running in Galaxy. So, as you edit parameters, run a [partial] simulation, plot results, and like what you see (or maybe don’t like it, but want to keep it anyway) - you can save the current state of your model using the File -> Save project menu option:
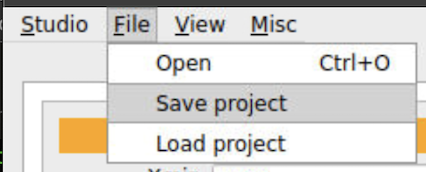
This will prompt you to name your project, e.g., my_model.zip (or whatever you choose to name it) and will zip together the relevant files and copy the .zip to your History column on the main Galaxy panel. Note the “‘PhysiCell’ History” checkbox. If this is checked (which we recommend), your .zip will be copied into a Galaxy History named “PhysiCell”. If that History does not exist, it will be created. (If you are displaying a list of all your Histories on the main Galaxy tab, you will need to refresh the tab before you will see the “PhysiCell” History).
In summary, when presented with the initial dialog panel, you have the options to 1) check “PhysiCell” History if you want it saved there, 2) rename the base filename, and 3) suffix a timestamp onto the filename. Then press “Save .zip”. Another dialog panel will pop up telling you what will happen and you can press “OK” (or “Cancel”). Then click “Close” on the original panel.

You can switch from the “Unnamed” History to the “PhysiCell” History using one of the icons at the top of the History column.

Note that it may take a few seconds for the .zip project to appear in your Galaxy History. If you click on that entry, it will expand and reveal a download icon that, when clicked, will download it to your local computer and give it an expanded name, Galaxy<ID#>-<filename>.
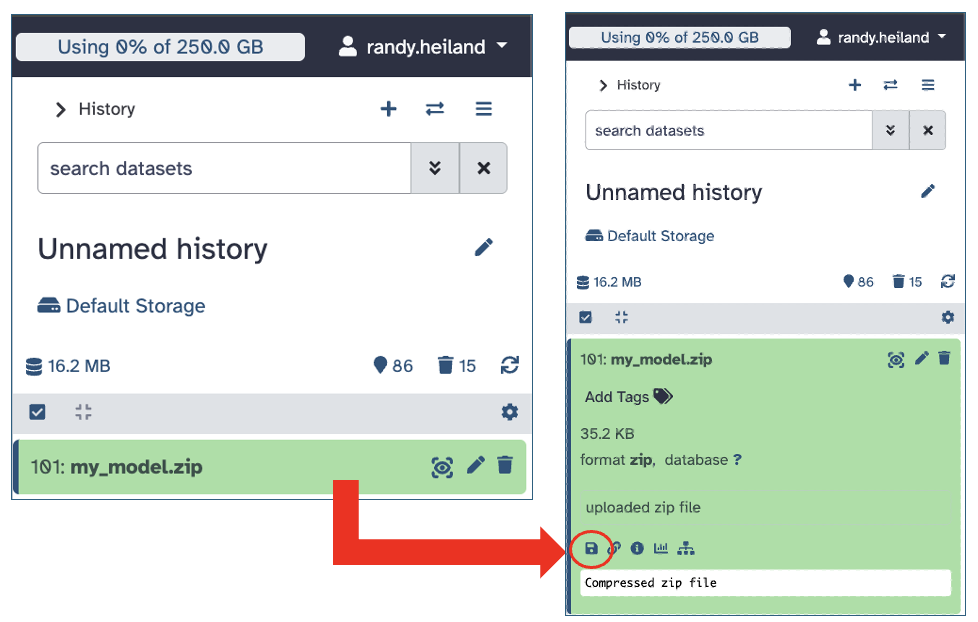
Unzipping that file on your computer will provide the files that define your project, typically: PhysiCell_settings.xml, cell_rules.csv, and cells.csv.
Loading a project
To load a previously saved project, use the File -> Load project menu option:
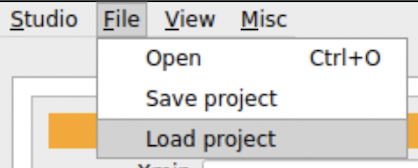
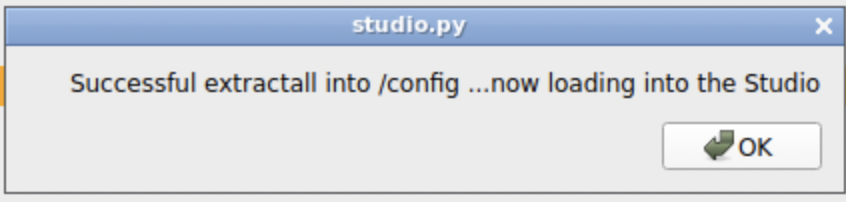
This will display a file dialog of all .zip files in your History (it may take a few seconds if you have several). Note that a .zip suffix is not unique to project files (you can also zip up your output results, but do not try to “Load” those).

Exporting your project
An alternative to saving your project to the Galaxy History is to Export it to a GitHub repository. However, it does require some additional effort. First, you need to create a (Fine-grained) Personal Access Token (PAT) for the GitHub repo(s). Then you need to upload this PAT to your Galaxy History: 1. In Galaxy, click Upload Data 2. Choose Paste/Fetch Data 3. Paste just your token (nothing else): 4. Set the format to txt, give it a name like github_token (with no obvious name in history if you’re privacy-conscious) 5. Click Start — it becomes a dataset in your history
Then in PhysiCell Studio, use the Studio -> Settings panel to get the PAT by providing its History ID (you only need to do this once per Studio session):

Then you can use the File -> Export project menu option:

It will request the necessary information and explain what happens next.

Importing your project
You can also import a project (.zip) from a GitHub repo. This does not require a PAT (for a public repo). Selecting File -> Import project will request the necessary information and step you through it. Once it completes, you will need to do File -> Open the .xml configuration file which is probably in the config directory.

Saving simulation results
To save all simulation results, you can use the File -> Save sim output menu item. This can take some time, depending on how many output files you have. The same file naming options and saving to the “PhysiCell” History applies here too.

Once it has been zipped and copied to your History, you can download it to your desktop computer:
